420 Rigging Guide
Go To: Sailing - Rigging Guides
Posted on 14 March 2009 19:26
A smaller version of the olympic 470 class, the 420 was formerly a youth development class (i.e. young people trained up in the 420 before moving onto olympic class boats), the 420 has a good class following, and is a good introduction to performance boats.
The 420 has a Plymouth Yardstick (Handicap Number) of 1087 - pretty fast, but still fair. For those who like the 420, as they progress they may move into the larger 470, which has a similar layout but is slightly larger. The 420 has a single crew trapeze and a symmetric spinnaker, and for those nutters amongst you, can even be setup to sail single handed.
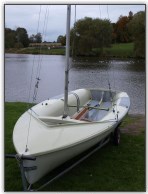
Photo 1, The 420, ready to rig with no wind.
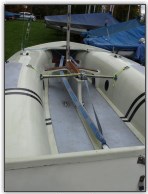
Photo 2, Cockpit layout
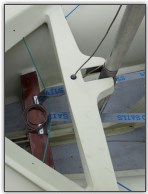
Photo 3, Front bulkhead and mast
What You need
- Hull
- Mast + Shrouds and Forestay
- Boom
- Main Sail
- Rudder
- Centreboard (usually attached)
- Outhaul
- Downhaul
- Kicking Strap
- Bungs
- Painter Rope
- Elastic bungee for the trapeze
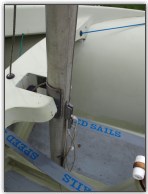
Photo 4, Mast and halyard jammer arrangement
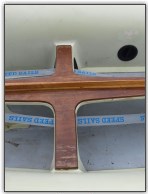
Photo 5, Thwarte and centreboard
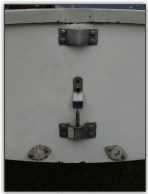
Photo 6, Rudder pintles
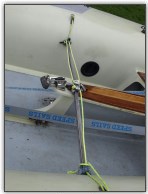
Photo 7, Traveller
Lets Get Started!
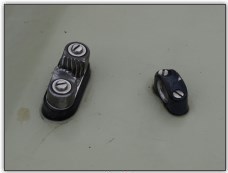
Photo 8, Jib sheet jammers
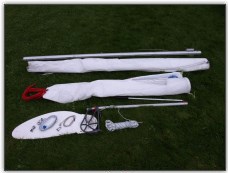
Photo 9, Parts laid out ready to rig
Before starting for the first time, make sure you have everything available, or a rope and spares box handy. The 420 hull is smooth with no chines (ridges), so can be quite "tippy". Once again the 420 is a restricted design rather than one design, so there is room for alternatives, if you want to experiment or upgrade, we suggest you take a look at the 420 Class Rules for more information.
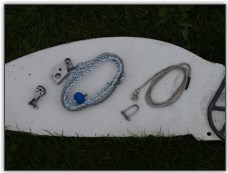
Photo 10, Closeup of kicker parts

Photo 11, Underside of boom
1. Mast
We chose not to take apart the mast and take it down. If yours comes with the mast off, which it possibly will, it's a simple matter of untangling the shroud and forestay wires, dropping the bottom of the mast into the mast step inside the boat (after checking the bottom of the mast is clean), and then securing the shroud and forestay wires with split pins and rings or whatever other fittings are on your boat. It's a good idea to check the state of the pulley sheaves in the bottom of the mast - if these are rusted, jammed up or just don't run very well it makes it harder to hoist the sails.
We recommend two people to step the mast - one to hold the mast up while the other attaches the pins. Masts on 420's can vary, with jammers and pulley blocks in different positions. The spreaders should be adjustable - although we haven't yet covered adjusting these in an article, look for one soon.
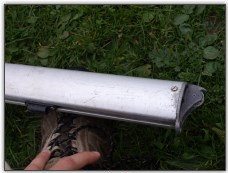
Photo 12, Back end of boom
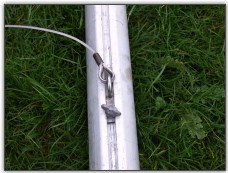
Photo 13, Kicker attachment on boom
Photo 14, Spinnaker pole holders
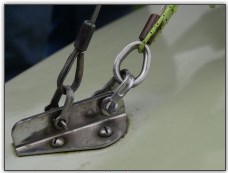
Photo 15, Attach the jib to the front chainplate
2. Jib
Attach the fitting at the bottom of the jib luff to the chainplate or fixing at the front of the deck, as shown in Photo 15. The jib goes behind the forestay, as shown. Attach the top of the jib luff to the free end of the halyard with a shackle (Photo 16), and then hoist the jib. Tie the halyard off into the appropriate jammer/cleat, usually found on the mast on a 420. At this point, if the mast is adjusted correctly, the jib luff should now be tight, and the forestay a little slack, as shown in the photo. To achieve this, the best way is for one person to pull forward on the forestay to pull the mast forward slightly, while the other hoists the jib.
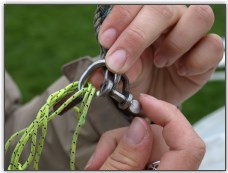
Photo 16, Attach the jib to the end of the halyard
Next, attach the jib sheets to the clew on the jib. The easiest way is to double the rope over to find the midpoint, tie one stopper knot, feed it through the clew, and then tie another stopper knot the other side - this keeps the rope with equal lengths either side (Photo 19). Feed the working ends of each jib sheet inside each shroud and trapeze wire, through the fairlead and jammer block (Photo 20). Finish it off with a stopper or figure 8 knot.
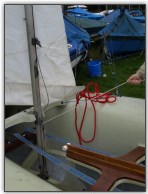
Photo 17, Hoist the jib
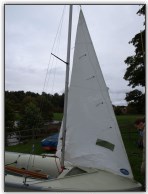
Photo 18, Jib hoisted. The wind was starting to pick up...
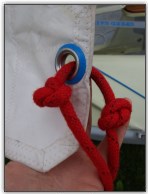
Photo 19, Jib sheet attached to clew of jib
An alternative method is to use continuous jib sheets, particularly if you are mad enough to sail it single handed. There are two ways to do this - either rig as above, and tie the ends together, or for a more permanent arrangement without any knots in the boat, dou need to do this slightly back to front, and feed the working ends through the jammers backwards, before attaching to the sail. Pass each end through the clew so there are two lengths of rope going through the clew, and then tie a fishermans knot - tie a single basic knot in each piece of rope, with the other end passing through the middle of it. This will make it harder to take the jib sheets off, so don't do it if you need to derig quickly; it also means you can't use the jibsheet to help right the boat after a capsize.
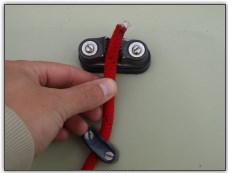
Photo 20, Pass the jib sheets through the jammers
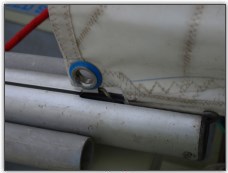
Photo 21, Slide the main sail foot car into the boom
3. Main Sail onto boom
Next, feed the car on the bottom of the mainsail (Photo 21), and then the mainsail foot, into the slot on the top of the boom (Photo 22). Pull it along until it reaches the end (photo 23), then slide a cotter pin into the fitting at the end (Photo 24), through the eye in the tack, to hold the front egde of the sail.
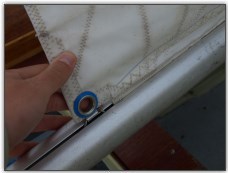
Photo 22, Pull the main sail along the boom
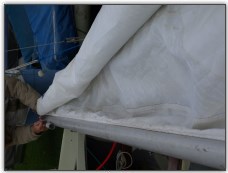
Photo 23, All the way to the end
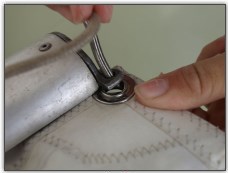
Photo 24, Pin the tack of the main sail

Photo 25, Thread the outhaul rope thorugh the jammer
4. Outhaul
We have the end of our outhaul rope whipped with tape to stop it fraying, and we had no source of flame available. Put a knot in one end of the outhaul rope, and then pass the other, working end, through the v jammer style cleat on the underside of the boom (Photo 25). Pass it through the boom end (Photo 26), around the sheave (Photo 27), and through to the top of the boom (Photo 28). Next, either attach it to a shackle (Photo 29) and the shackle to the clew of the sail, or directly attach it to the clew using a bowline. The complete outhaul can be seen in Photo 31. If you are setting up the boat for competitive racing, you may wish to change this arrangement, just remember to keep within the class rules!
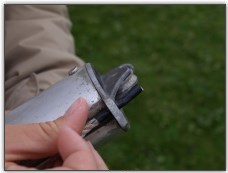
Photo 26, Then through the end of the boom
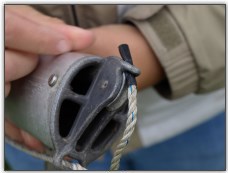
Photo 27, Around the sheave
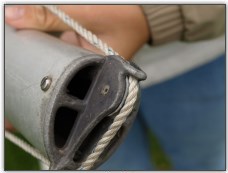
Photo 28, Pull it through
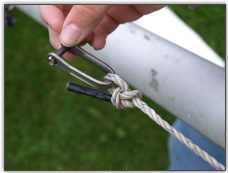
Photo 29, Attach to a shackle or the sail
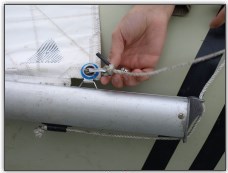
Photo 30, A shackle can be used for quick derigging
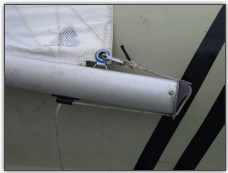
Photo 31, Outhaul complete
5. Hoist mainsail
Attach the main sail halyard to the top of the mainsail using an appropriate shackle (Photo 32), then one person should feed the main sail luff into the slot on the back of the mast (Photo 33), as the other hoists it using the halyard (Photo 34).
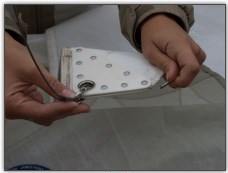
Photo 32, Attach the main sail halyard
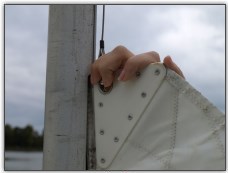
Photo 33, Feed the main sail luff into the mast slot
Do not put the boom on the gooseneck yet - one person should lift the boom to take the weight off the sail, and then hoist the sail to the top of the mast. Next, pull down on the boom and feed it onto the gooseneck (Photo 35).
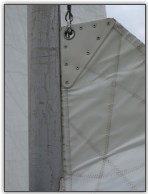
Photo 34, Hoist the main sail
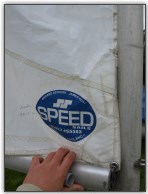
Photo 35, Pull the boom down to the gooseneck
6. Kicker
Now, put the kicker together. A swivel block is attached to the mast, and a v-jammer to the underside of the boom. In our pictures, the v-jammer is attached to a short length of steel wire, which is permanently fixed onto the underside of the boom.

Photo 36, Assemble the kicker
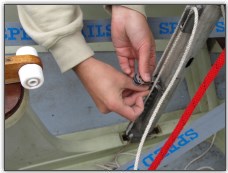
Photo 37, Assemble the kicker
Next, feed the rope through the blocks as shown, starting by tying the one end to the becket on the v-jammer, down through the swivel block from underneath up to the top, then back up to the v-jammer, around and out through the jammer. Put a stopper or figure 8 knot in the end to sop it going through. See Photos 36-38 to assemble the kicker, and Photo 39 for the completed kicking strap.
7. Trapeze Handles + Elastic
Assemble the trapeze handle jammers in the same manner as the kicker - although in the picture shown, our top block is twisted round (Photo 40). A length of elastic reaches from one handle to the other, going from a handle, through a fairlead, through a whole in the deck/bow, behind the mast, then out the other side to the other trapeze handle (Photos 41 and 42). We'd recommend not using the trapeze the first time you go out, until you get more used to the boat, unless you are a very experienced trapeze artist!
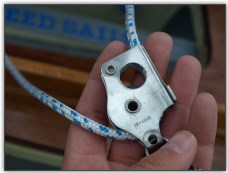
Photo 38, Assemble the kicker

Photo 39, The complete kicker (2:1)
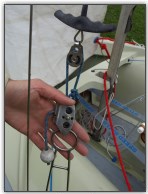
Photo 40, An assembled trapeze wire and handle
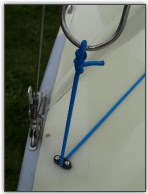
Photo 41, The trapeze elastic
8. Mainsheet + Traveller
Tie one end of the main sheet to the fairlead fixing in the middle of the underside of the boom behind the swivel block (Photo 43), with a bowline (Photo 44). Feed it through the block attached to the traveller behind the centreboard (Photo 45), then back up and through the swivel block on the boom (Photo 46). Next, take the working end down, and through the pull and then the jammer block (Photo 47), and finish off with a stopper or figure 8 knot.
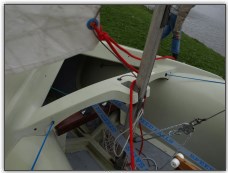
Photo 42, The trapeze elastic
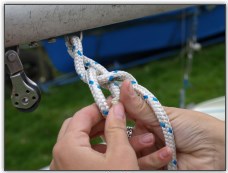
Photo 43, Attach the main sheet to the boom
Different traveller designs are used on 420s - on ours an older one is in use, which has seen better days. Unfortunately, its broken to the point where it can no longer be used as a traveller, and is difficult to replace because it is fixed onto the bouyancy tanks at either side - this is an important thing to look out for when buying a 420.
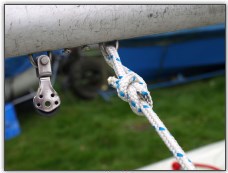
Photo 44, Attach the main sheet to the boom
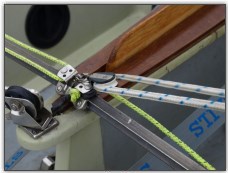
Photo 45, Through the pulley on the traveller
In theory, the position of the traveller can either be fixed by jamming the adjustment lines to control the amount of twist in the sail, or left to move from side to side as required.
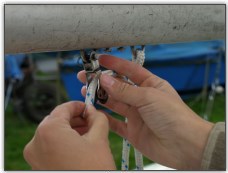
Photo 46, Back up to the pulley on the boom
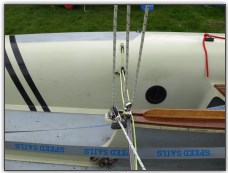
Photo 47, The complete mainsheet
9. Rudder
This is an easy one - attach the rudder to the pintles on transom as shown (Photo 48). Depending on your style of rudder/tiller, you may have uphaul and/or downhaul lines on it (Photo 49).
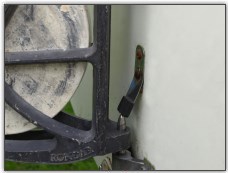
Photo 48, Add the rudder
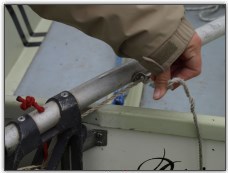
Photo 49, Attach the rudder uphaul
10. Bungs
Ensure you place all bungs into holes that require them - this is important, as 420's have very large bouyancy tanks which don't take well to filling up with water (Photos 50 and 51).
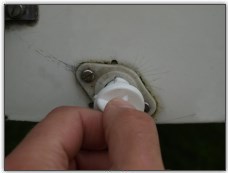
Photo 50, Don't forget the bungs!
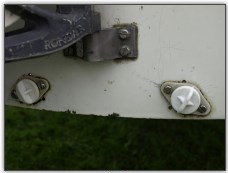
Photo 51, Don't forget the bungs!
11. Buying a 420
There are several things to watch out for when buying a second hand 420. First of all, check for the springiness of the tops of the bouyancy tanks, where you sit - these can be weaker on older models and are difficult to strengthen. Also look at the traveller and see what condition it is in, and how easy to replace - be careful if it is similar to ours as we are having difficulty locating spares to repair ours. As always, check for the condition of the deck, and look for any cracks or damage, particularly along seams, joins and structural areas.
On the mast, the pulley blocks can wear out quickly, as they tend to sit in water at the bottom of the boat. This can make it hard to hoist the sail. On the subject of the sail - check the luff for any damage, particularly around the top full length batten where it can wear and make it hard to hoist the sail.
Check any hairline cracks around the hull - it is usual to see them on an older boat, just make sure they aren't hiding more damage, particularly in corners or joins.
Summary
There you have it - a fully rigged and ready to sail 420. The 420 does have a spinnaker - unfortunately we had no wind when we started rigging our boat, but a devilish Force 6 by the time we finished, so not very good for rigging a spinnaker on land. We will revisit the 420 soon and add an article on rigging the spinnaker.
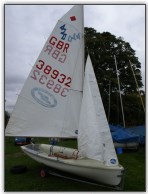
Photo 52, The 420, all rigged (minus spinnaker)
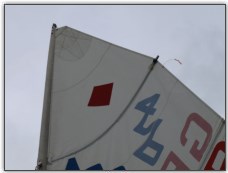
Photo 53, A rather windy day by now, with good sail shape and streaming telltales!
- Download the PDF version of this article