How To Fold a Sail
Go To: Sailing - Learn To Sail
Posted on 26 September 2008 16:44
There are several different ways to fold a sail - how you fold the sail will depend not only on how new the sail is, but also how much space you have to store it.
We are going to look at four of the most common ways to store a sail:
- Rolling it around a boom, pole or tube;
- Concertina folding it;
- Folding it to it's corners;
- Rolling it on itself;
Rolling around a boom
This method is best for if you have plenty of spare for storing the sail, and you want to keep them in the best condition possible. You don't have ot use your boom - we used a spinnaker pole, or you can get cardboard tubes, plastic drainpipe, anything round and long, just don't use anything too heavy or anything that will rust (so if you use a boom or metal pole, make sure it and the sail are dry).
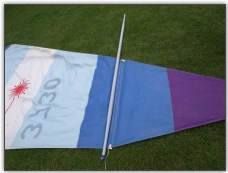
Photo 1, Place the boom or pole on the sail
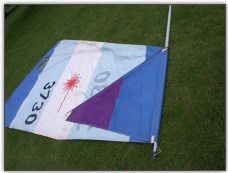
Photo 2, Fold the top part of the sail over on itself
Start by laying out the sail on the ground (Photo 1). If you wish to tightly roll the sail, we advise you take the battens out if possible, otherwise you have to roll much more carefully to avoid twisting or snapping the batten. If you have full width battens in the sail you can't remove, then put the object you are going to roll around on top of the first batten and keep the sail straight as you roll it. Next, take the top of the sail and fold it over onto the main body as shown (Photo 2).
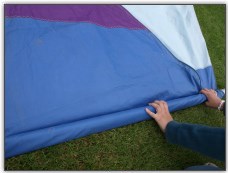
Photo 3, Roll the sail
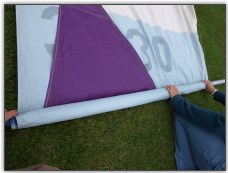
Photo 4, Continue rolling the sail
If you don't have full width battens, you can start rolling around the objecty from the top of the sail. Start rolling carefully, it helps if there are two people to do this, one for each end (Photo 3). Keep it fairly tight (although if it's a brand new sail you may wish to roll it looser), and roll the full length of the sail up. (Photos 4, 5, 6)
Photo 5, Roll the sail some more...
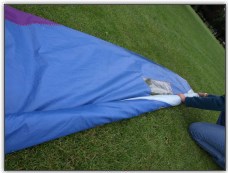
Photo 6, Until you finish rolling it
Once finished (Photo 7), you can either secure the sail with a few velcro straps, or a few short lengths of cord or rope to tie around and put a few hitches in. Alternatively, you can get sail bags which can be found on Ebay for as little as 10 pounds, which you just slide the entire length into.
Note you can do this with main sails without a boom or pole to roll around if they are fairly new and pretty crisp - just roll around the luff. For a similar method, see Rolling the jib below.
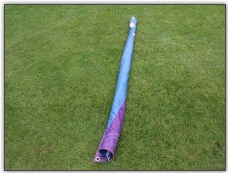
Photo 7, The finished sail
Concertina Fold
It's important to not fold the sail along the same creases everytime you fold it to store it; this causes the fibres of the sail to break and weaken. This method shouldn't be used on new sails unless absolutely necessary.

Photo 8, Spread the sail out
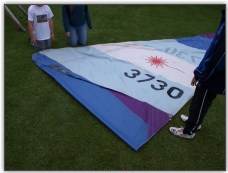
Photo 9, Square off the bottom
To concertina fold a sail, first spread it out on the floor, as in Photo 8 (try to avoid any puddles or molehills). Because a sail does not have square edges, fold the bottom portion of the sail up first to make it square, as shown in Photo 9.
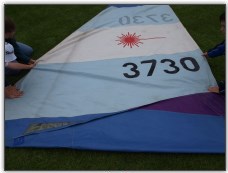
Photo 10, Start folding...
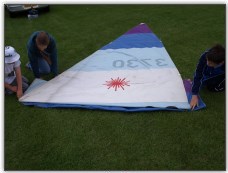
Photo 11, ... like this
This requires two people now - one on either side of the sail, one on the luff and one on the leech. Place your one hand about 12-15 inches (30-45 cm) from the bottom edge (Photo 10), and your other hand an equal distance from your first hand, as shown. Your first hand you place down will stay still and hold the sail, and your second hand will pull the sail across the top of your first hand, as in Photo 11.
Do this now - pull the sail across, and straight out the fold so it is stored flat. Next, place your hands in similar positions again, with the first hand on the edge of the folds that are starting to form, and the second hand about 30-45cm away again, and repeat the folding action.

Photo 12, Place some more folds
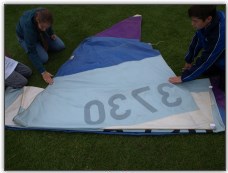
Photo 13, Keep folding
Keep repeating this, until all the sail is folded up. You may have to move in towards the middle of the sail as the sail isn't straight (Photo 14). When you have folded all the sail, move to one end (it doesn't matter which), and fold the sail over again in 30-45cm sections (Photos 15, 16, and 17). This does not have to be concertina folded - just effectively flat roll it.
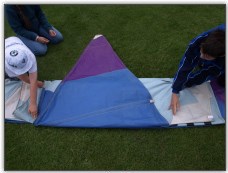
Photo 14, Until you reach the end
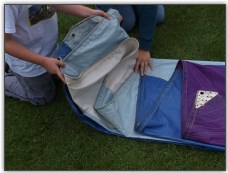
Photo 15, Start folding the end over
In our photos we've folded it a little too large - but thats ok. Vary your size of fold each time to avoid folding along the same creases each time.
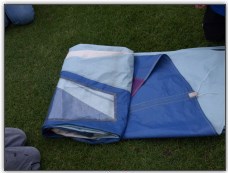
Photo 16, Fold it into a package
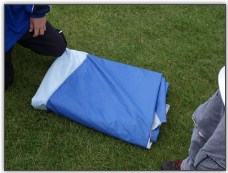
Photo 17, The finished sail
Fold the corners
This is one of the quickest ways to fold a sail, ideal if it's raining, or just somethign to vary how you fold along the creases.

Photo 18, Lay the sail out flat

Photo 19, Fold the top down to the bottom
It's easiest to lay the sail out flat on the floor (Photo 18), then take the head of the sail, and pull it down to the tack (back lower corner) of the sail (Photo 19), then pull the clew into the tack, effectively making a rectangle of the sail (Photo 20). Then, you can choose to fold from any side you want, to fold it in half (Photo 21). We folded it in half down the length, and then in half again (Photo 22), and then finally did some smaller folds (effectively square rolls), until it's a small package, about 12 inches by 24 inches (30cm x 60cm), as in Photos 23-26.

Photo 20, Fold the sail into a square
Photo 21, Fold it over in half
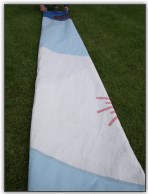
Photo 22, fold it in half again
We don't advise you doing this on any sail that still has that crisp, crinkly feeling to it - you won't be able to fold it tightly enough, or if you try you'll put some permanent creases into it, it's only really best for older sails.
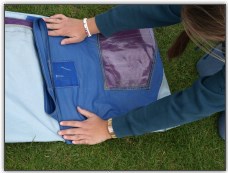
Photo 23, Start folding the end over
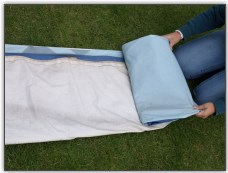
Photo 24, Flat fold it end over end
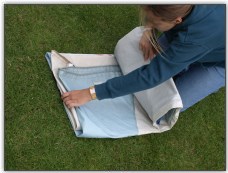
Photo 25, Continue folding...
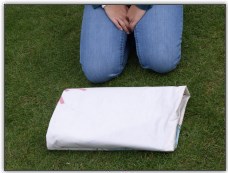
Photo 26, into a package
Rolling the jib
This is mostly for rolling jibs, around the luff. Because you can't easily roll this on the floor, it's best to stand head to wind or out of the wind if possible so the wind doesn't catch the sail. This technique works best on jibs with wire core up the luff; we can't confirm how well this would work on zipper jibs that you can get on certain catamarans.
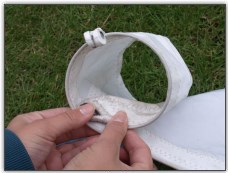
Photo 25, Start a small roll at the head of the sail
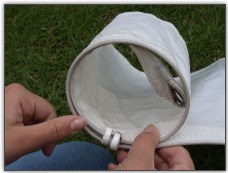
Photo 26, Continue rolling it
Start at the head of the sail, taking the wire head and start rolling the sail fairly tightly (Photos 25 and 26). Try to vary the direction you roll it in each time you put it away, to avoid putting permanent twists into the wire.
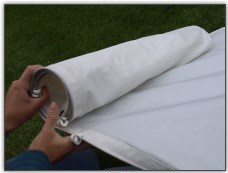
Photo 27, Roll it down its length
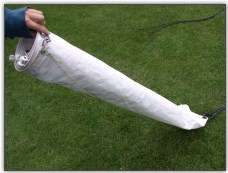
Photo 28, Until its completely rolled
As shown in the pictures, continue rolling the jib around the luff, making sure the sail rolls evenly - if you hold it upright, the sail tends to fall evenly anyway (Photos 27 and 28). When you have finished, you can either slide it into a sail bag if you have one long enough, or if it's an older sail, fold it end over itself several times into a small package, and use the jib sheets to wrap around it to hold it together, and stop it unfolding - but don't tie it up too tightly (Photos 29 to 32).
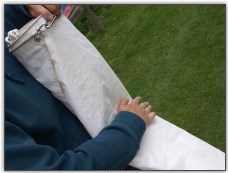
Photo 29, Fold it into a package
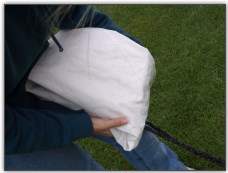
Photo 30, Fold it into a package
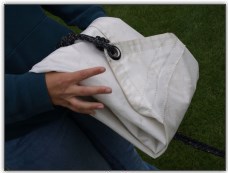
Photo 31, Fold it into a package
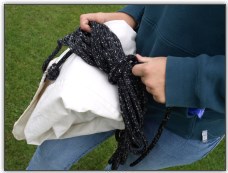
Photo 32, Coil up the jib sheets
Storing sails
No matter how you fold the sail, if you don't store it well it will still get damaged. If you can, then store it either upright or flat, with nothing on top of it that could squash, crease or damage it, and keep metal/liquids away from sails to avoid staining them.
It's best to dry sails completely before storing them - if sails are stored damp, they can eventually have mould build up on them, which damages the material. Also, if folded wet, the fibres dry and can weaken, weakening the sail. Additionally, if they are stored wet, any metal studs or eyeholes in the sail that are not stainless steel can rust leaving permanent marks on the sail - we've come across a number of sails like this.
Sails should also be stored clean - so if you took a dip and got the sail covered in mud, then wash it off before it dries - mostly just washing it in the lake or sea will do to clear the mud until you can get it home and do it properly - if you get sails wet in salt-water, then its best to wash it in freshwater as soon as possible - salt crystals will form when the salt-water dries, and can form in between the sail fibres, forcing them apart and damaging them.
As long as sails are stored dry, the temperature doesn't matter too much, if they are to be stored below freezing, then it needs to be a dry atmosphere (i.e. a damp shed isn't very good); a cool to warm garage is best.
Summary
If you're serious about sailing, or value your money, you'll take care of your sails as long as possible. Hopefully we've given you some good tips to get started! If you have any other ideas or suggestions that you think we should add, we'd be glad to hear them either in the Forums or via Contact Us.