Dinghy Repair Rudder Repairs
Go To: Sailing - Dinghy Repair
Posted on 17 April 2008 18:59
The rudder and tiller on your boat are pretty important pieces of kit - you may have sails full of wind, but without a rudder and tiller, you'll be hard pushed to get the boat to go in the direction you want. Sure, you CAN steer a boat using body weight, but it's difficult!
Taking care of your rudder and tiller should be a priority - this one had been through a few scrapes. The rudder blade itself is in great condition, with only a tiny nick in it where the back of it comes up and meets the rudder stock, which is too small for us to bother doing anything with.
The tiller needed some work however. First off - the tiller extension. At some point, we believe the universal joint had been in an awkward position, and the extension been under too much pressure, and it bent it pretty badly (see Photos 1 and 2). This is a metal tiller extension.
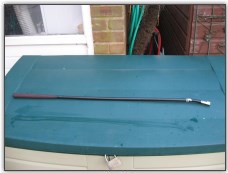
Photo 1. Bent tiller extension
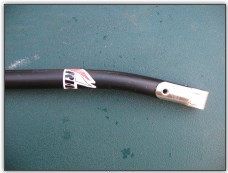
Photo 2. Bent tiller extension
Several options were considered for straightening the tiller. The first idea was to put the extension in a vice, with the bent part of the tiller in the vice, and tighten it up slowly, thinking the vice would straighten it out - unfortunately it won't, it will simply crush the extension at that point.
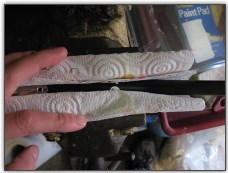
Photo 3. Straightening the tiller extension
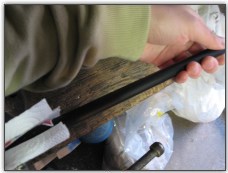
Photo 4. Straightening the tiller extension
If you need to straighten an extension, the best way is to just bend it, carefully and slowly. Tighten the end up in a vice (wrap it in a towel or tissue to minimise scraping, Photo 3), and carefully apply force in the required direction to straighten it. Depending on the bend in the metal you may need to rotate it in different directions (Photo 4). Of course - this will only work on metal tiller extensions, if you need to bend a carbon tiller extension you've got much worse problems (since carbon fibre won't bend).
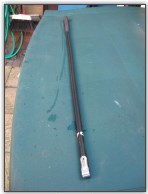
Photo 5. Straightened tiller extension
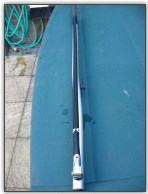
Photo 6. But the tiller is bent...
Unfortunately, once we got the tiller extension straightened (Photo 5), we realised the tiller itself is bent (Photo 6). It appears that at some point, the downhaul rope from the rudder was secured onto the cleat on the tiller very tightly, when the rudder hit something at some speed, attempted to kick back up, couldn't, pulled on the cleat, stressed the metal around the cleat, and bent the tiller slightly. It's not bent enough to be a problem, or enough to significantly weaken the metal, and it's not bent enough to warrant doing something about, other than to ensure it doesn't happen again (more on that later).
Next, there was no way to secure the tiller and extension into the rudder; hence, the first time we took the boat sailing the tiller kept coming out of the rudder. Many insurers actually have a clause in your terms and conditions that say you have to specifically ensure the rudder is secured to the boat or your insurance is invalidated if it falls off and you lose it. The rudder stock itself had a small hole in the top (Photo 7), but the tiller did not have a matching hole.
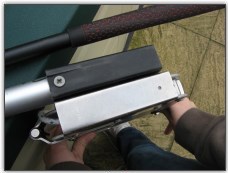
Photo 7. Drilling the pin hole

Photo 8. Drilling the pilot hole
Cue one drill, several drill bits, and two pairs of hands. We lined up the tiller into the stock as far as it would go under normal conditions, and drilled a small pilot hole (Photo 8). We then worked our way up with gradually larger drill bits (Photo 9), until a cotter pin of sufficient size to fill the hole would fit all the way through (Photo 10).
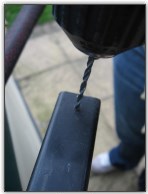
Photo 9. Drilling the pin hole
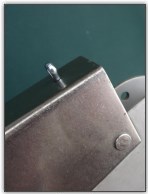
Photo 10. Fitting the pin
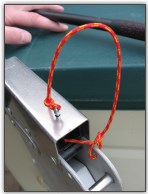
Photo 11. Securing the pin
Putting the pin in is all well and good - but you need to get it out again later. So, a small length of cord-thickness rope now secures the split pin to the rudder stock, and the pin secures the rudder stock to the tiller extension (Photo 11). Because of the way the tiller fits under the traveller on a Laser 2, it's unlikely that the rudder will come off the boat and become lost with the tiller attached to it - there's also the level in between the two pintles on the back of the boat that the rudder fits to - but now we're sure it won't go anywhere.
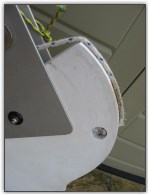
Photo 12. Old ropes
Photo 13. Remember the positions
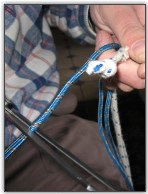
Photo 14. Measure the the new downhaul
Finally, we replaced the downhaul on the rudder. It was an old piece of fraying rope, not particularly nice to the fingers (Photo 12), so we replaced it with similar thickness 12-braid polypropylene rope (actually rock climbing rope, so it should be strong enough!), using a plain overhand knot as the stopper into the rudder blade (Photos 13, 14, 15, 16 and 17).
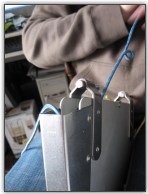
Photo 15. Fitting the downhaul
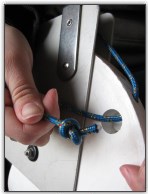
Photo 16. Tie it off
At the end of the rope where it would go around the cleat on the tiller, we have attached a length of shock cord as a handle. Some rudder/tillers will use just shock cord instead of rope, but we opted for this instead. The shockcord handle will allow easy downhauling of the rudder blade, but also have some elasticity and "give" in the cord to allow the rudder to pop up a small amount if it hits anything, and not put as much stress on the tiller as plain rope cleated off would (Photo 18).
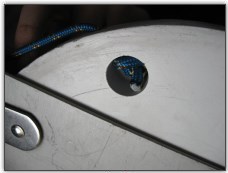
Photo 17. Secure the knot
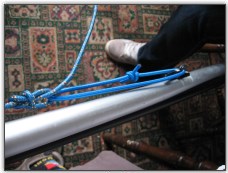
Photo 18. Shockcord handle
Finally, as you can see in Photo 12, there is a length of yellow rope attached to the rudder stock - the other end of this is attached to the bung from the back of the boat, which has a small hole drilled through the handle; this bung is secured to the rudder, so we'll never be missing the bung!