Laser Standard Rigging Guide
Go To: Sailing - Rigging Guides
Posted on 18 November 2007 00:37
So you've got that shiny new (or more likely not so shiny second hand) standard Laser, waiting to be sailed, but you don't have a clue how to rig it. Find out here!
Chances are, if you're a member of a sailing club, there's someone around who'll be able to explain to you just how to rig a standard Laser (since they're arguably the most popular and widely sold sailing dinghy in the world). But, if you're the DIY type, here's how to rig a standard laser.
What you need:
- Mast (top and bottom sections);
- Boom;
- Main sail;
- Rudder;
- Daggerboard;
- Tiller and extension;
- Outhaul (long length of rope);
- Cunningham (medium length of rope);
- Clew tie down (small length of rope);
- Mainsheet;
- Kicking strap;
- Painter rope;
- Horse (a rope for the rear rigging arrangements).
Lets Get Started!
Before you start, assemble all your pieces, using the list above as a guide. You might need extra pieces of rope here or there. Make sure the boat is generally clean (it doesn't have to be spotless!), like the boat in Fig 1 and 2. This boat is over 30 years old, yet is in good condition for its' age and has many races in it yet, with many already under it's belt. Second hand lasers can be found for less than £500. Note the layout of the cockpit, with the spring assisted main block, the guard rails down the sides, the toe-strap down the centre line, and the self baler at the back of the cockpit. You'll send more time sat on the sides than in here, so don't worry about the size!
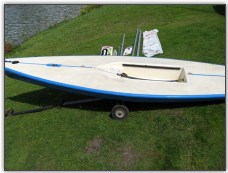
Fig 1. Laser hull ready to rig
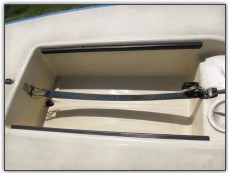
Fig 2. The layout of the cockpit
In Figures 3 and 4 the equipment you can see the equipment laid out ready to rig. We've taken everything apart and coiled it up neatly to show the rigging from a starting point. If you get a laser brand new, it'll may not be even at this stage, but you should get instructions with it, to get it to the point where you can follow our guide. In Fig 3, notice the topmost aluminium section is the bottom mast, then the topmast, then the boom.
In Figure 4, we have highlighted the ropes and blocks, including the kicking strap (top of the photo), the sail battens, the clew tie down (blue rope), outhaul (pink rope), the horse (yellow rope on the right with the block in the centre) and the cunningham/downhaul (yellow rope in the centre). Also note the bung on the left of the picture, for putting in the back of the boat to stop it sinking.
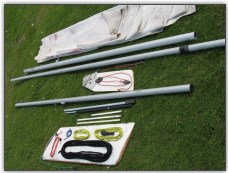
Fig 3. Equipment laid out ready
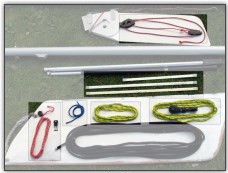
Fig 4. Closeup of equipment
1. Bungs and Bailers!
Put bungs in (or corks, or anything that will plug that little hole) the back of the boat (after ensuring the bouyancy tank is empty, since the cockpits can leak on older boats) and ensure the self-bailer (looks like a rubber bung, shown in Fig 2) is in the up position so water doesn't leak into the boat and sink you before you start.
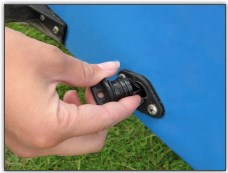
Fig 5. Inserting the bung
2. The Mast
Put masts together (the biggest pieces of the meccano kit that you have in front of you), don't worry about them coming apart, the sail and gravity will hold them together when it is pulled on.
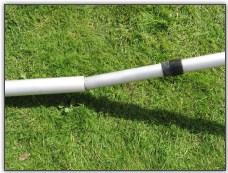
Fig 6. Assembling the mast
3. The Sail and Sail Battens
Put the battens (the things that look like flat sticks, which help the sail curve more aerodynamically) in the sail, and slide the sail over the end of the mast carefully, making sure that the foot (the bottom) of the sail is in line with the gooseneck (the multi-directional joint partway up the bottom section of the mast).
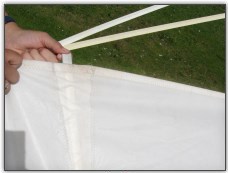
Fig 7. Inserting the battens
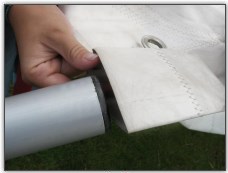
Fig 8. Adding the sail
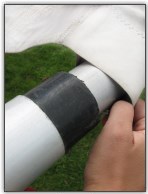
Fig 9. The sail
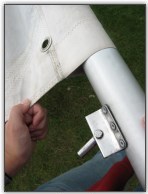
Fig 10. Aligning the sail
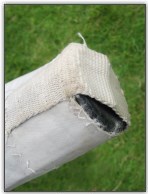
Fig 11. The sail end sock
4. Raise the Mast
Carefully raise the mast and place it into the mast step (the round hole in the deck) in the boat, making sure there is no dirt or grass on the bottom of the mast which would damage the bottom of the mast and the mast step.
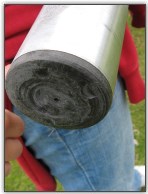
Fig 12. Checking the mast foot
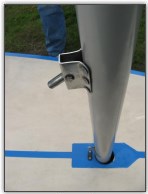
Fig 13. Raising the mast
5. Add the Boom
Insert boom onto the gooseneck, making sure it's the correct way up (the two pulley blocks should be underneath).
6. The Outhaul
Tie the outhaul rope onto the eyehole on the topside of the end of the boom, using the loop of a bowline (Fig 14 and 16), then feed it through a shackle or straight through the clew of the sail (Fig 15), then back through the eyehole. This forms a simple pulley system. Feed the rope along the top of the boom, through the jam cleat (Fig 17), and secure with a stopper knot.
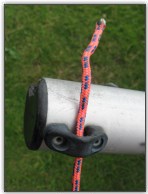
Fig 14. Attach the outhaul end
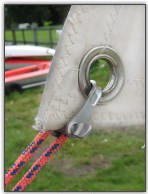
Fig 15. Attach to the sail
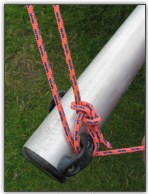
Fig 16. Back through the fairlead
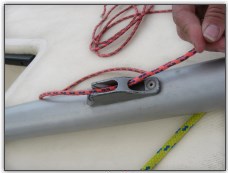
Fig 17. Securing the outhaul
7. Tie down the sail
Tie the clew (the hole in the bottom corner of the sail) down to the boom with the clew tie down, using a reef knot.
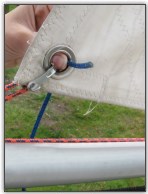
Fig 17. Clew tie down
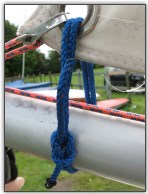
Fig 18. Clew tie down
8. The Cunningham
Use the loop of a bowline to secure the end of the cunningham to the gooseneck (Figure 19). Take the working end of the rope through the eyehole in the tack (front) of the sail (Figure 20), and through the eyehole on the deck just in front of the mast (Figure 21), then finally through the jam cleat on the deck, and secure with a stopper knot (Figure 22).
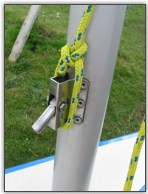
Fig 19. Start the downhaul
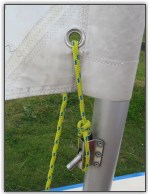
Fig 20. Through the sail
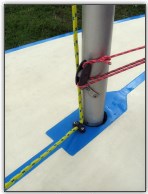
Fig 21. Through the eyehole
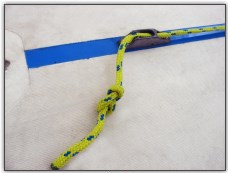
Fig 22. Securing the downhaul
9. The Kicking Strap
Attach the kicking strap (otherwise known as the kicker).
Assemble the kicking strap as shown in the picture. Secure the bottom end to the mast with a shack or clevis pin (as shown), and the top end to the fitting on the underside of the boom.
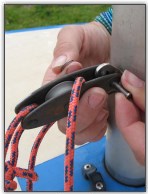
Fig 23. Kicker bottom
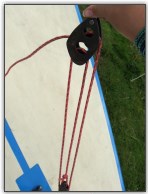
Fig 24. Kicker assembly
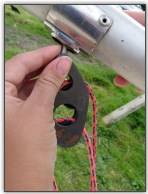
Fig 25. Kicker top
10. The Horse
Next, to attach the horse, check out the pictures below. To start, tie a bowline in one end of the rope (Fig 26). Next, take the working end through the eyehole on one of the sides of back of the deck (Fig 27). As you take it across the back of the boat, pass it through the bottom half of the one mainblock (Fig 28), and then through the eyehole on the other side of the boat (Fig 29). The working end of the rope should then go through the loop in the bowline, forming a triangle shape (Fig 30) and through the clam cleat at the edge of the cockpit, and secure with a stopper knot (Fig 31).
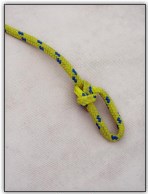
Fig 26. Bowline to start
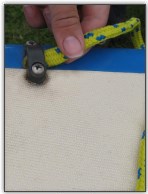
Fig 27. Through the eyehole
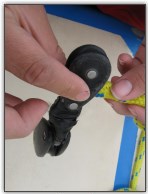
Fig 28. Mainblock
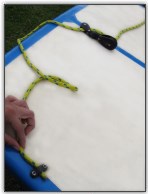
Fig 29. Other eyehole
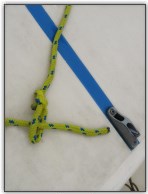
Fig 30. Through the loop
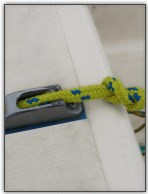
Fig 31. Cleat and secure
11. The Main Sheet
Secure the end of the mainsheet to the block on the underside of the end of the boom, using a bowline loop around the becket on the block. Take the working end of the rope through the block on the horse/traveller, making sure it goes from front to back, then up and back through the first block, from back to front. Next, the rope goes along the boom, through the eyehole, then through the block halfway along the boom. Next it drops down and goes through the rachet block at the front of the cockpit (front to back), and is secured with a knot in the end of the rope.
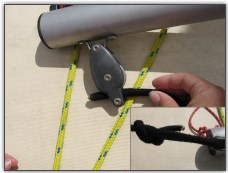
Fig 32. First block and bowline
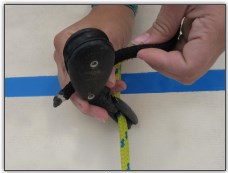
Fig 33. Second block
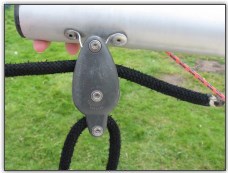
Fig 34. Back through first block
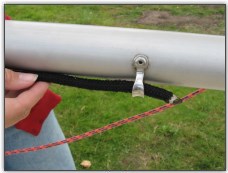
Fig 35. Through eyehole on boom
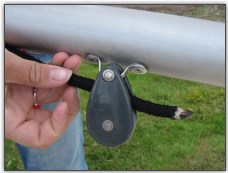
Fig 36. Through block on boom
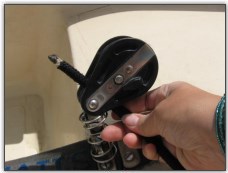
Fig 37. Through main block
12. The Rudder
Attach the rudder by placing the two pins on the rudder into the two matching holes on the stern (back) of the boat.
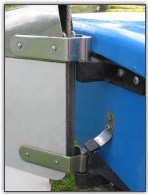
Fig 38. The rudder
13. The Tiller and Tiller Extension
Insert the tiller underneath the horse into the rudder block, and secure it with a split pin. Feed the rope from the rudder into it's jammer on the tiller - this is used to pull the rudder down into position when you're on the water.
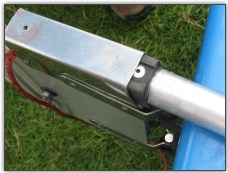
Fig 39. Insert the tiller
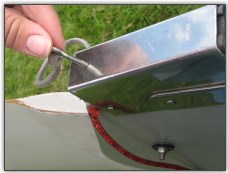
Fig 40. Secure the tiller
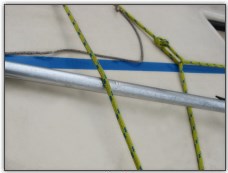
Fig 41. Extension under the horse
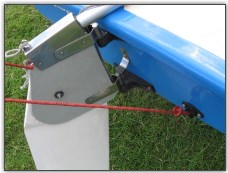
Fig 42. Secure the rudder
14. The Daggerboard
Attach daggerboard to mast using the shock cord (elastic bungee), by running it around the mast and attaching it back on itself, so it doesn't float off and sink when you're shocked and drop it.
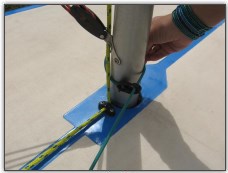
Fig 43. Attach the centreboard
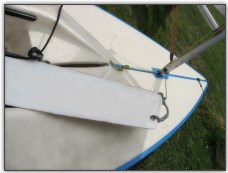
Fig 44. Nice and safe!
15. Done!
Launch the boat, remembering your bouncy aid!
We hope this guide has been of use - if there are any bits that don't seem right or you need more explanation on, get in touch with us!
- Download the PDF version of this article